Iterating rapidly to find changes which improve results on the validation set.
Here I’m going to go further, showing the process I used to tackle the Paddy Doctor competition, leading to four submissions in a row which all were (at the time of submission) in 1st place, each one more accurate than the last. You might be surprised to discover that the process of doing this was nearly entirely mechanistic and didn’t involve any consideration of the actual data or evaluation details at all.
This notebook is the first in a series showing every step of the process. At the end of this notebook we’ll have a basic submission; by the end of the series you’ll see how I got to the top of the table!:
As a special extra, I’m also opening up early a selection of “walkthru” videos that we’ve been preparing for the new upcoming fast.ai course. Each day I do a walkthru with fast.ai fellows and registered students, and we record those sessions. They’ll all be released at the same time as the next course (probably August 2022), but I’m releasing the ones covering this competition right now! Here they are:
First, we’ll get the data. I’ve just created a new library called fastkaggle which has a few handy features, including getting the data for a competition correctly regardless of whether we’re running on Kaggle or elsewhere. Note you’ll need to first accept the competition rules and join the competition, and you’ll need your kaggle API key file kaggle.json downloaded if you’re running this somewhere other than on Kaggle. setup_comp is the function we use in fastkaggle to grab the data, and install or upgrade our needed python modules when we’re running on Kaggle:
Now we can import the stuff we’ll need from fastai, set a seed (for reproducibility – just for the purposes of making this notebook easier to write; I don’t recommend doing that in your own analysis however) and check what’s in the data:
from fastai.vision.allimport*set_seed(42)path.ls()
Looks like the images might be 480x640 – let’s check all their sizes. This is faster if we do it in parallel, so we’ll use fastcore’s parallel for this:
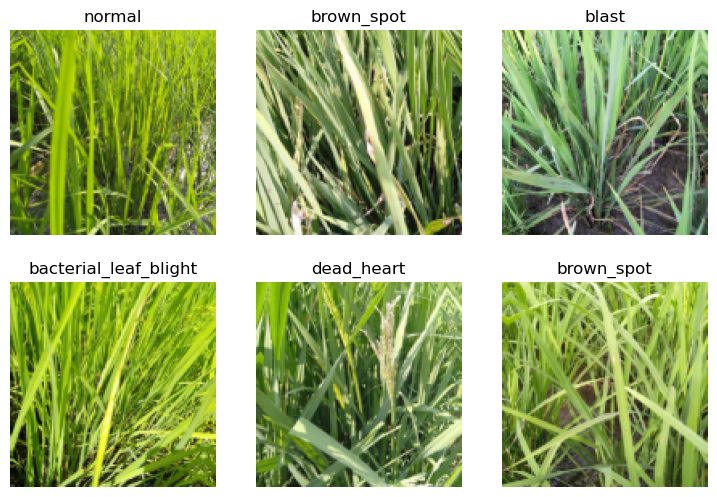
They’re nearly all the same size, except for a few. Because of those few, however, we’ll need to make sure we always resize each image to common dimensions first, otherwise fastai won’t be able to create batches. For now, we’ll just squish them to 480x480 images, and then once they’re in batches we do a random resized crop down to a smaller size, along with the other default fastai augmentations provided by aug_transforms. We’ll start out with small resized images, since we want to be able to iterate quickly:
Let’s create a model. To pick an architecture, we should look at the options in The best vision models for fine-tuning. I like the looks of resnet26d, which is the fastest resolution-independent model which gets into the top-15 lists there.
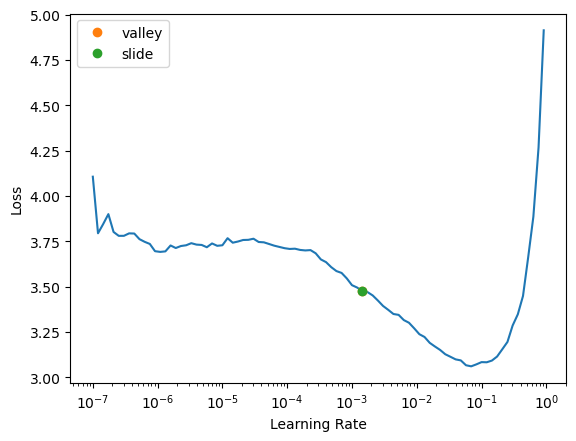
lr_find generally recommends rather conservative learning rates, to ensure that your model will train successfully. I generally like to push it a bit higher if I can. Let’s train a few epochs and see how it looks:
learn.fine_tune(5)
epoch
train_loss
valid_loss
error_rate
time
0
2.014854
1.233058
0.388275
01:01
epoch
train_loss
valid_loss
error_rate
time
0
1.348343
0.917006
0.298895
01:03
1
1.131407
0.720297
0.234503
01:07
2
0.927136
0.603111
0.189332
01:15
3
0.790826
0.523225
0.161941
01:16
4
0.710640
0.512586
0.159058
01:12
We’re now ready to build our first submission. Let’s take a look at the sample Kaggle provided to see what it needs to look like:
OK so we need a CSV containing all the test images, in alphabetical order, and the predicted label for each one. We can create the needed test set using fastai like so:
We can now get the probabilities of each class, and the index of the most likely class, from this test set (the 2nd thing returned by get_preds are the targets, which are blank for a test set, so we discard them):
Let’s submit this to kaggle. We can do it from the notebook if we’re running on Kaggle, otherwise we can use the API:
ifnot iskaggle:from kaggle import api api.competition_submit_cli('subm.csv', 'initial rn26d 128px', name)
---------------------------------------------------------------------------NameError Traceback (most recent call last)
Cell In[29], line 1----> 1ifnotiskaggle:
2fromkaggleimport api
3 api.competition_submit_cli('subm.csv', 'initial rn26d 128px', name)
NameError: name 'iskaggle' is not defined
Success! We successfully created a submission.
Conclusion
Our initial submission is not very good (top 80% of teams) but it only took a minute to train. The important thing is that we have a good starting point to iterate from, and we can do rapid iterations. Every step from loading the data to creating the model to submitting to Kaggle is all automated and runs quickly.
Therefore, we can now try lots of things quickly and easily and use those experiments to improve our results. In the next notebook, we’ll do exactly that! So if you’re ready, take a look at part 2 of the series.
If you found this notebook useful, please remember to click the little up-arrow at the top to upvote it, since I like to know when people have found my work useful, and it helps others find it too. And if you have any questions or comments, please pop them below – I read every comment I receive!
Addendum
fastkaggle also provides a function that pushes a notebook to Kaggle Notebooks. I wrote this notebook on my own machine, and pushed it to Kaggle from there – here’s the command I used:
# install fastkaggle if not availabletry: import fastkaggleexceptModuleNotFoundError:!pip install -Uq fastkagglefrom fastkaggle import*
Your kernel title does not resolve to the specified id. This may result in surprising behavior. We suggest making your title something that resolves to the specified id. See https://en.wikipedia.org/wiki/Clean_URL#Slug for more information on how slugs are determined.
Kernel version 1 successfully pushed.  Please check progress at https://www.kaggle.com/code/bensonthekkel/060-kaggle-tut1